

To find a leak in a central heating system, check radiator valves for damp, follow visible pipe runs, and look under the boiler for drips near the filling loop or pressure relief valve. If pressure keeps dropping with nothing visibly wet, the leak is likely under a floor or in a wall, and a specialist survey is the next step.
In This Guide
How to find a leak in a central heating system: where to start looking
Most people notice a heating leak two ways: the boiler pressure gauge keeps creeping down, or a patch of carpet, ceiling or skirting board stays damp for no obvious reason. Work through the system in order, because central heating leaks tend to show up in the same handful of places.
Start with the parts you can see and touch: radiator valves, exposed pipe runs, and the boiler casing. These account for a large share of the leaks we get called out to trace, and a homeowner can rule them in or out with fifteen minutes and a dry cloth. Do this first pass with the heating switched on, since a slow weep often only shows itself once the metal has warmed and expanded slightly.
Checking radiator valves and joints
Radiator valves are the single most common source of a visible central heating leak. Every radiator has at least two, the manual or thermostatic valve on one side and the lockshield valve on the other, and both loosen slightly over years of heating and cooling.
Run a dry sheet of kitchen roll around the base of each valve and around the nut that connects it to the radiator. Leave it a minute, then check for a damp mark. Do the same at the bleed valve, since a worn bleed washer is a common, easy-to-fix culprit.
Step 1: Dry everything first
Wipe down each valve and joint with a dry cloth so any new dampness is easy to spot.
Step 2: Check after the heating has been on for 20 minutes
Feel around valve bodies, joints and the bleed screw again once the system is properly warm.
Step 3: Look behind and underneath
Pull the radiator slightly from the wall if you can, and check the skirting board and floor directly beneath it for staining.
Step 4: Check every radiator in the house
A slow leak elsewhere in the system can cause pressure loss that looks, at first glance, like it belongs to the radiator nearest the boiler.
If a valve is damp, a loose nut can sometimes be nipped up gently with a spanner, a quarter turn at a time. Overtightening compression fittings is a common way to crack them, so stop as soon as the drip stops. If tightening does not fix it, the olive or washer inside has likely failed, a job for a heating engineer rather than a leak specialist.
Following visible pipe runs
Once radiators are ruled out, follow the pipework you can see: under the kitchen sink, along cupboard backs, around the hot water cylinder, and anywhere pipework crosses a loft space. Look for green or white mineral staining on copper pipe, a sign of a slow weep that has been drying and re-wetting over weeks.
Compression joints, elbow fittings and any point where pipe diameter changes are worth extra attention, as is any spot where a previous plumber has cut into a run to add a valve or branch.
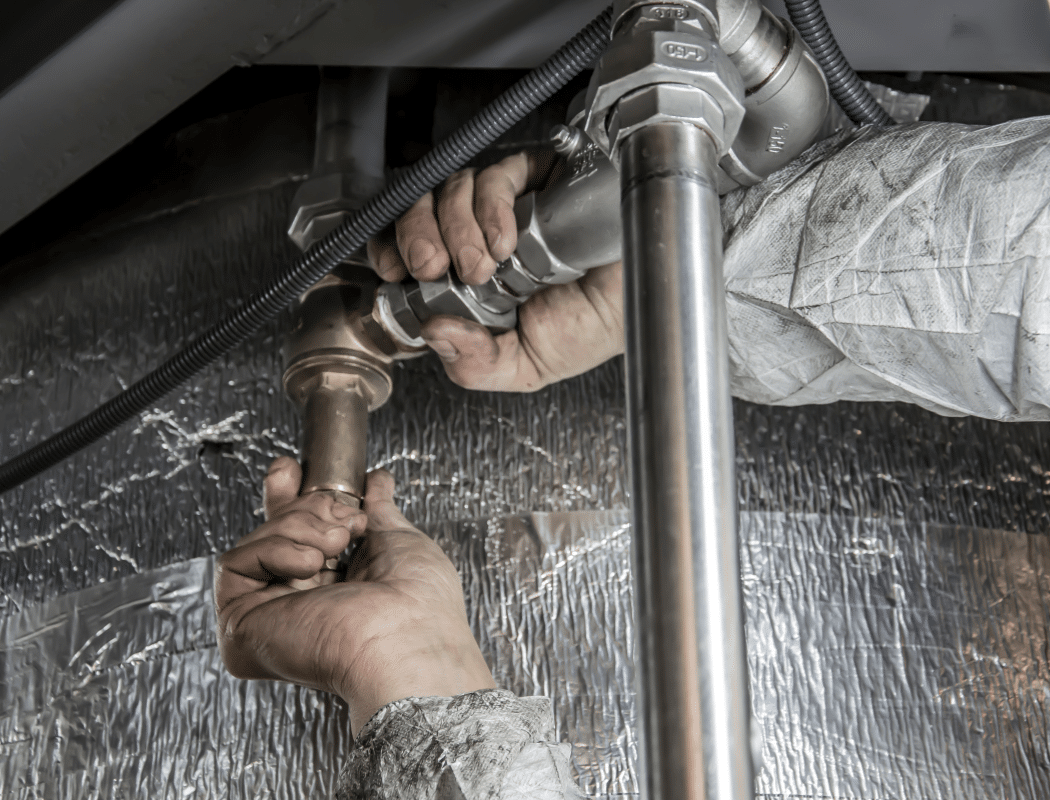
Pipe runs under floors and in cupboards
Any accessible pipe run under a suspended floor, in a cupboard, or crossing a loft is worth a proper look with a torch. Staining or a faint tide mark on insulation is often the only clue that a joint further along has been weeping.
If your home is a Scottish tenement sharing pipework with neighbours, a leak in a communal run can show up on someone else’s ceiling before your own. Check your visible pipework first, then compare notes with the flat below and work out whether the pipe is common to the block or sole use to one flat.
Checking the boiler itself
The boiler is a common source of both real leaks and false alarms. Open the casing if you are comfortable doing so and look at the base for pooling water, staining on components, or a wet patch on the wall behind it.
Pay particular attention to the filling loop, the flexible braided hose used to top up pressure, and the pressure relief valve, which has a small discharge pipe usually running outside through an external wall. A dripping relief valve is often venting because pressure is too high, not because the valve has failed.
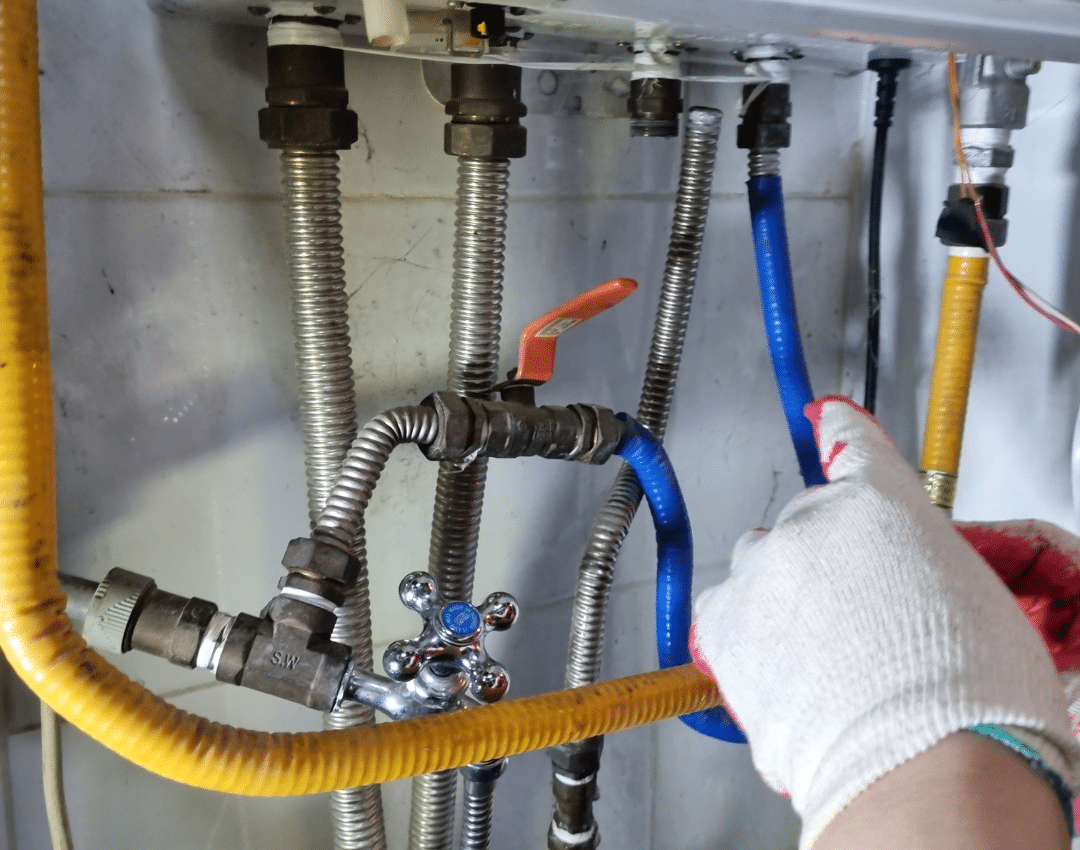
The filling loop and pressure relief valve
The filling loop is the part most likely to weep after a recent top-up. Check that both valves on the loop are fully closed and check the flexible hose for dampness along its length.
If you ever smell gas near the boiler, stop checking, leave the property with doors and windows open if it is safe to do so, and call the National Gas Emergency line on 0800 111 999 immediately. Leak detection specialists do not handle gas emergencies.
The pressure-drop timing test
Combi boilers typically run at a normal cold pressure of around 1 to 1.5 bar, the single most useful number for working out whether you have a leak at all, before hunting for where it is. Pressure that keeps dropping below that range and needs repeated topping up means something is losing water in the sealed system.
The test is simple. Top the system up to the correct pressure, note the reading and time, then check again after a few hours and again the next morning. A system with no leak holds pressure within a small margin overnight. One that drops noticeably has a leak in the sealed circuit, even with no damp patch anywhere in the house.
| What you observe | What it usually means |
|---|---|
| Pressure holds steady over 24 hours | No active leak in the sealed system at this time |
| Pressure drops slowly over several days | Small leak, possibly a valve, joint or radiator that has not shown a visible mark yet |
| Pressure drops quickly within hours | Larger leak, often somewhere in the main pipe run rather than a single fitting |
| Pressure drops but every radiator and joint checks dry | Leak is likely hidden under a floor, in a wall, or below a screed |
This test confirms a leak exists and roughly how fast it is losing water. It does not tell you where the leak is, and floorboards often get lifted on a hunch once the test confirms one, when the location still needs proper narrowing down.
Still cannot find the leak in your central heating system?
If the pressure still will not hold after checking every radiator, pipe and the boiler, the leak has likely moved somewhere DIY checks cannot reach. We use thermal imaging and acoustic equipment to pinpoint hidden heating leaks without lifting floors on a guess.
When the leak is hidden under a floor or in a wall
Once every radiator, valve and visible pipe run checks out and the pressure keeps dropping, the leak is almost certainly somewhere you cannot see: under a suspended timber floor, beneath solid screed, or buried in a stud wall. This is common in older Scottish properties, where heating pipework was run under floorboards decades ago and later covered by new flooring.
Guessing where to cut into a floor or wall at this point is the wrong move. Trace and access cover, standard in most buildings insurance, pays for finding the leak and making good the search damage, but not repairing the pipe itself, and Confused.com notes most policies cover up to about £5,000 of that cost. Cutting into the wrong section of floor wastes that allowance, exactly what professional central heating leak detection is built to avoid.
Heating leaks are actually among the easier hidden leaks to pinpoint without lifting anything. Run the heating and the escaping hot water warms whatever surrounds it, and a thermal camera picks up that warm patch through floorboards, laminate or plaster. Acoustic equipment or tracer gas then confirms the exact spot before a single board comes up. That is why the survey stage matters more than the repair stage: the repair itself is often a small job once someone knows exactly where to work.
DIY checks are right for you if
- The damp patch or drip is visible and reachable
- Pressure is only just outside the normal range
- You can see which valve or joint is wet
Call a specialist if
- Pressure keeps dropping with no visible mark anywhere
- The suspected leak is under a floor, screed or wall
- You are about to lift flooring on a guess
Where DIY checks stop and a specialist survey starts
A torch and a dry cloth can only tell you about pipework you can physically reach, and a sealed heating system routes pipes through exactly the places that are hardest to get to: under screed, inside stud walls, beneath fitted flooring. That is why non-invasive detection exists.
A proper survey uses thermal imaging to spot the temperature difference a hidden leak leaves on a surface, alongside acoustic equipment that picks up the sound of water escaping a pressurised pipe, even through concrete.
- No blind cutting: the leak is pinpointed before anyone touches a floorboard or plasterboard.
- Works on solid and suspended floors: thermal and acoustic methods both read through screed, timber and most floor coverings.
- Insurance-ready reporting: findings are documented in a format insurers recognise for a trace and access claim.
- Same-day results in most cases: a survey usually confirms the leak location in a single visit.
We have detected more than 5,000 leaks across Scotland, and the pattern repeats: radiators and the boiler are already ruled out, and the pressure is still falling. That is the point where a torch stops being useful.
Frequently Asked Questions
The clearest sign is boiler pressure that keeps dropping below the normal 1 to 1.5 bar range and needs repeated topping up. Damp patches on ceilings, walls or floors near pipe runs are the other main clue, especially if they reappear after drying.
Yes, for visible leaks. A dry cloth, a torch and the pressure-drop timing test will find or rule out most radiator, valve and boiler leaks. Hidden leaks under floors or in walls need thermal imaging or acoustic equipment to locate accurately.
A sealed system loses pressure when water escapes somewhere in the pipe run, radiators or boiler, even if the leak is too small or too well hidden to spot visually. Pipework under floors and in walls is the most common hidden location.
Not usually, but it should be fixed promptly. A slow drip from a valve or joint can soak into flooring and skirting boards over time, and persistent pressure loss puts extra strain on the boiler. It is a plumbing job, not a gas safety issue.
Topping up only masks a leak temporarily. If pressure needs repeated topping up over days or weeks, water is still escaping somewhere in the system. The underlying leak still needs to be found and repaired, and repeated topping up on its own puts extra strain on the boiler over time.
Most buildings insurance includes trace and access cover as standard, which pays for locating the leak and making good the search damage, commonly up to around £5,000 according to Confused.com. It does not cover repairing the pipe itself, so check your own policy schedule.
We would not recommend it. Lifting flooring on a guess often misses the actual leak and can use up trace and access allowance for nothing. A thermal or acoustic survey confirms the exact spot first, so any opening up that follows is targeted.
As soon as it is confirmed. A small leak left alone tends to get worse, wastes heat, and can cause hidden damage to floors and walls long before it becomes obvious. Same-day surveys are usually available once you get in touch.
📍 Professional Leak Detection Across Scotland
Don’t let a small problem become a big one
If your own checks have ruled out the obvious spots and the pressure still will not hold, our non-invasive surveys find the leak without guesswork, with insurance-approved reporting if you need to make a claim.