
Thermal imaging leak detection uses an infrared camera to map surface temperature, not water. A leak often cools or warms the surrounding material, so it shows up as an odd patch on the thermal image. It cannot confirm water on its own, so we pair it with moisture readings, acoustic listening or tracer gas before we say where to dig or drill.
In This Guide
What the camera actually sees
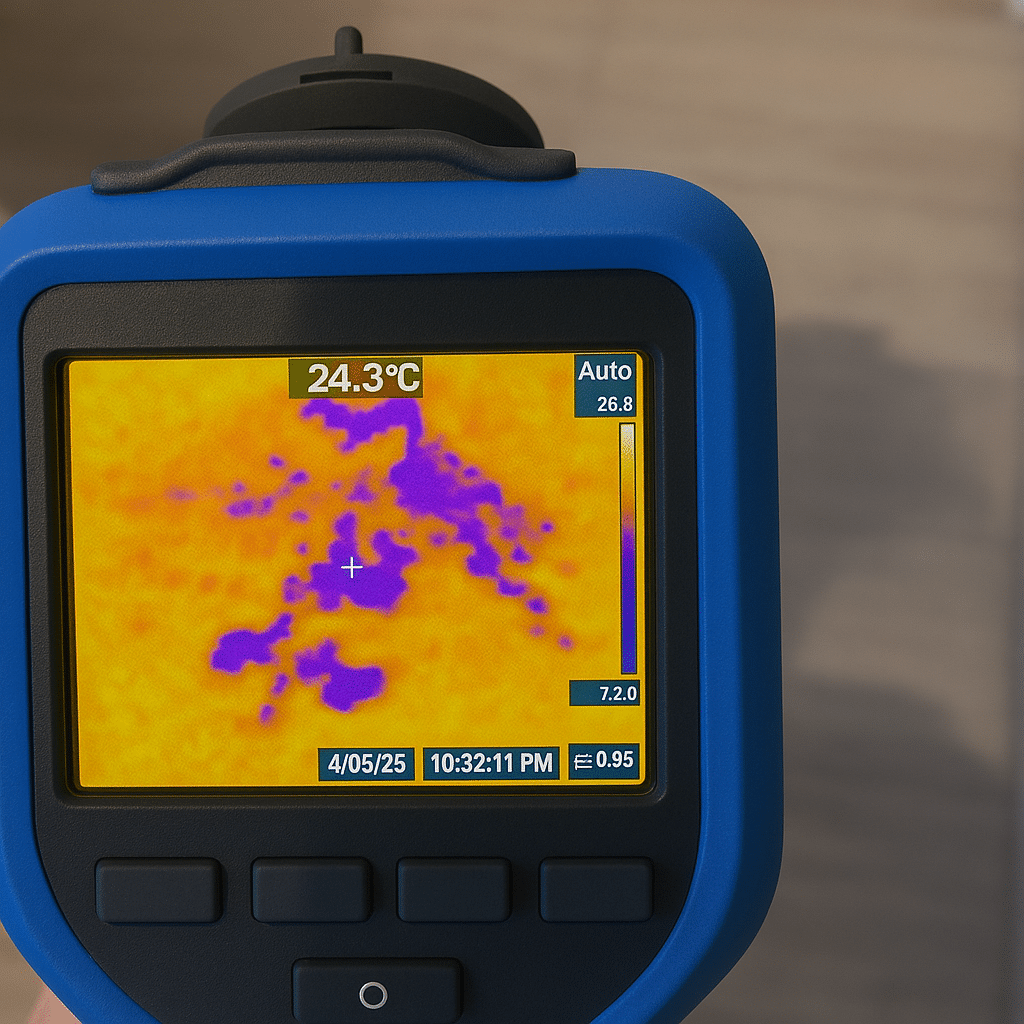
A thermal imaging camera does not see water. It sees heat. Every surface in your home gives off infrared radiation depending on its temperature, and the camera turns that radiation into a colour map on a screen. Warm areas show up as orange or white, cool areas as blue or purple, with a gradient in between. That is the whole trick behind thermal imaging leak detection: it makes an invisible temperature difference visible.
Water changes the thermal behaviour of whatever it touches. A wet patch of plaster holds and loses heat differently to a dry patch next to it. A pipe carrying hot water reads warmer than the wall around it. A slow leak soaking into a floor screed will often show as a cooler, damp-looking smear once the water has been sitting for a while. None of that is visible to the naked eye until staining appears, sometimes weeks later. The camera catches it earlier.
The equipment we use
Our engineers carry handheld infrared cameras built for building diagnostics rather than the cheaper consumer models sold for DIY use. They read finer temperature differences, down to fractions of a degree, and hold that accuracy across a whole room scan rather than just a single spot check.
Why leaks show up as heat patterns
Three things drive the pattern an engineer looks for. First, evaporative cooling: water evaporating from a wet surface pulls heat with it, so a leak under a floor tends to read cooler than dry areas nearby. Second, thermal mass: wet material holds heat differently than dry material of the same type, so a soaked patch of plasterboard behaves unlike the dry board around it even after the water itself has stopped moving. Third, direct heat transfer from the pipe itself, most obvious with hot water leaks and with central heating leak detection, where warm water tracks along a joist or under a floor and leaves a long, thin heat trail the engineer can follow back towards the source.
The pattern matters more than the reading itself. A single warm or cool spot on its own tells you very little. A trail that runs in a straight line, following where a pipe is likely to be routed, is a much stronger signal. Reading that shape is the actual skill in this job, and it is why the camera is only as good as the person interpreting the image.
Cold bridges and other false positives
Older Scottish buildings are full of things that mimic a leak on a thermal image. A cold bridge, where a lintel, wall tie or the edge of a floor slab conducts outside temperature straight through the structure, reads as a cool patch just like damp does. Draughts around window reveals do the same. Poor insulation behind a radiator can leave a blotchy pattern that looks alarming but has nothing to do with water. An engineer who only trusts the colours on screen will call leaks that are not there. We treat every thermal anomaly as a lead to test, not a confirmed leak.
What thermal imaging can't tell you alone
This is the part homeowners are often surprised by. A thermal camera cannot see through a wall. It reads the surface in front of it, and infers what is happening behind that surface from the pattern of heat reaching it. It cannot tell you how much water is present, how long a leak has been running, or confirm with certainty that what it is seeing is water rather than a structural or insulation issue.
That is why we never rely on thermal imaging by itself. A proper survey backs up any thermal finding with a moisture meter reading at the surface, and often with acoustic listening equipment or a tracer gas test to pinpoint the exact pipe and depth. Thermal imaging tells us where to look closer. It rarely tells us, on its own, exactly where to cut.
If you have had a DIY thermal camera scan and been told there is "definitely" a leak based on colour alone, get a second opinion before anyone opens up a wall or floor. A cold bridge or a draughty socket can look just as dramatic on screen as an active leak.
How a thermal survey works, step by step
1. Initial conversation and access
We find out where the damp, staining or unexplained water use is showing up, and get access to that room plus the areas above, below and either side of it. Heat and water both travel, so the visible symptom is rarely directly above or below the source.
2. Baseline scan
The engineer scans the whole area first, including the surrounding walls and floor, to build a picture of normal temperature variation in that room. Without a baseline, an isolated anomaly is much harder to judge correctly.
3. Anomaly check with a moisture meter
Any cool or warm patch that looks like a candidate gets checked against a moisture meter reading at the surface. This is the step that rules out cold bridges and confirms whether there is actually water present.
4. Cross-reference with acoustic or tracer gas
Where the leak is on a pressurised pipe, we often add acoustic listening or a tracer gas test to narrow the exact point, rather than a general area. This is where thermal imaging leak detection earns its keep: it tells the team roughly where to aim the more precise tools, cutting the amount of guesswork before anything gets marked for opening up.
5. Report and marking
We mark the confirmed area and provide an insurance-approved report with the thermal images included, so your plumber, contractor or insurer can see exactly what was found and why.
Thermal imaging vs acoustic vs tracer gas
None of the three main non-invasive methods is universally "best". Each suits a different situation, and most surveys use more than one.
| Method | Best for | Limitation |
|---|---|---|
| Thermal imaging | Scanning a large area quickly; spotting damp patterns and heat trails behind plaster or under floors | Reads surface temperature only; needs confirmation from another method |
| Acoustic listening | Pinpointing a pressurised pipe leak by sound, especially underground or in concrete | Needs some water pressure and a fairly quiet environment to work well |
| Tracer gas | Confirming an exact point on a pipe run, including under solid floors | Pipe needs to be isolated and dried before gas is introduced |
Tracer gas testing, for reference, uses a safe mix of 5% hydrogen and 95% nitrogen pushed into the empty pipe. Any gas escaping at the leak point rises to the surface, where a sensitive probe picks it up. It is a different physics problem entirely to thermal imaging, which is why the two methods complement each other so well on a tricky job.
Reading the display on site
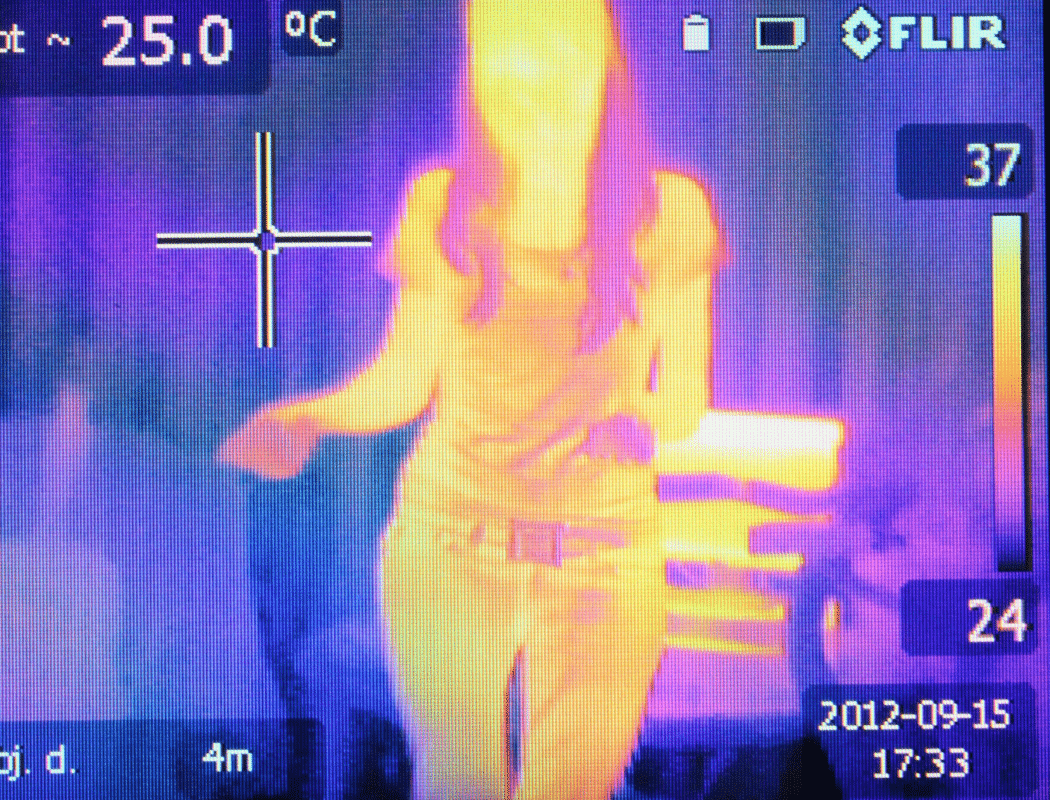
The colour scale on screen is relative to the room, not an absolute measure. An engineer adjusts the range as they scan, so a patch that looks dramatic in one image might be perfectly normal once the scale is recalibrated. This is why interpretation matters as much as the equipment.
Where it works best in Scottish homes
Thermal imaging tends to perform well in the kind of housing stock common across Scotland. Solid stone and granite walls hold heat differently to modern cavity construction, which can actually make temperature anomalies from damp or leaking pipework easier to spot once an engineer knows what the dry baseline for that wall type looks like. Tenement flats bring their own wrinkle: a stain on your ceiling may trace back to a shared pipe serving the flat above, not anything in your own property, so a scan often needs to check both flats to find the real source.
We see this most weeks in winter, when heating is running constantly and small leaks in a sealed central heating system show up faster against the warmer background. Cold snaps also bring a second pattern: frozen or newly-thawed pipes that have cracked, which a thermal scan picks up as the water starts moving again and cooling the surrounding material.
Scotland recorded around 3,100 burst pipes in winter 2023/24, Scottish Water reported, and more than 30% of those were on customer-owned property rather than the mains network. Thermal imaging is often the fastest way to find where a burst has tracked water before anyone opens up a ceiling or floor.
Not sure if that patch is a leak?
We run thermal imaging surveys across Scotland and back every finding with a second method before we mark anything. Non-invasive, same-day where possible, and every report is insurance-approved.
Frequently Asked Questions
It can find the heat pattern a leak leaves on the surface nearest to it, which is often enough to narrow down the search area. It does not see literally through a wall, so any anomaly still needs a moisture meter or a second method to confirm water is actually present.
Yes, though the pattern is usually subtler than with hot water. A cold water leak tends to show as a cooler patch caused by evaporation and the thermal properties of wet material, rather than direct heat transfer from the pipe itself. It still requires a trained read.
No. The camera is handheld and scans from inside the room with no drilling, lifting or cutting involved at this stage. Any opening up happens later, only once the leak location is confirmed, and only with your agreement.
Yes, this is one of the most common false positives. Lintels, wall ties and poorly insulated corners can all read as cool patches. A competent survey always checks a thermal anomaly against a moisture meter before treating it as a genuine leak.
Most residential surveys are completed same-day. The exact time depends on the size of the property and how many rooms need scanning, but a typical single-leak investigation is usually finished within a couple of hours on site.
Our reports are insurance-approved and include the thermal images alongside our findings, which most insurers and loss adjusters accept as evidence for an escape-of-water claim. Check your specific policy wording if you are unsure what your insurer needs.
It helps. A running heating system creates a stronger contrast between wet and dry areas, which makes anomalies easier to spot. If it is a central heating leak specifically, we will usually ask you to keep the system running until we arrive.
📍 Professional Leak Detection Across Scotland
Get a straight answer on what's behind your wall
Don't let a small problem become a big one. Our thermal imaging surveys are non-invasive, backed by a 99% success rate across 5,000+ leaks detected, and every job comes with an insurance-approved report.