

A leak detection survey starts with a conversation about the history of the problem, then moves through meter and pressure checks, a thermal imaging scan, acoustic listening and, if needed, tracer gas. The engineer marks the confirmed location on the surface and leaves you with a written, insurance-approved report. Nothing is dug up or opened speculatively.
In This Guide
What a leak detection survey actually involves
A leak detection survey is a structured visit, not a guess with a drill. Most people picture an engineer lifting floorboards and hoping for the best. That is not how it works. A proper survey follows the same sequence every time: talk, test, scan, listen, confirm, report. Each stage narrows down where the water is going before anyone touches a wall or a board.
We built our water leak detection service around one idea. You should never pay to have your home opened up on a hunch. Every step exists to rule things in or out with evidence, so that if something does need to be lifted later, it happens in exactly one place.
Step 1: taking a history
What happens
The engineer starts by asking questions, not by reaching for equipment. When did you first notice damp, a smell, or a drop in pressure? Has a bill or reading changed? Is there a specific room, ceiling stain, or patch of garden that stays wet? In a tenement, has the flat below reported anything? This conversation often points to a rough zone before a single tool comes out, and it means the rest of the survey is targeted rather than a blind sweep of the whole property.
This is also the point to mention any recent work: a new bathroom, a boiler swap, garden landscaping. Anything that disturbed pipework is relevant. If you are unsure whether the issue needs a specialist at all, our guide on leak detection specialist vs plumber covers how to tell the difference before you book anyone.
Step 2: meter and pressure checks
What happens
Next comes a basic diagnostic check. With everything in the house turned off, the engineer watches whether the meter still ticks over, which confirms water is moving somewhere it should not be. On a heating system, they will check pressure too. Combi boiler cold pressure typically sits around 1 to 1.5 bar, and persistent pressure loss can point to a leak in the boiler itself or somewhere in the sealed heating circuit rather than the mains supply.
These checks do not pinpoint a leak on their own, but they confirm one exists and roughly which system it is in, mains-fed or the closed heating loop, before the more specialist equipment comes out.
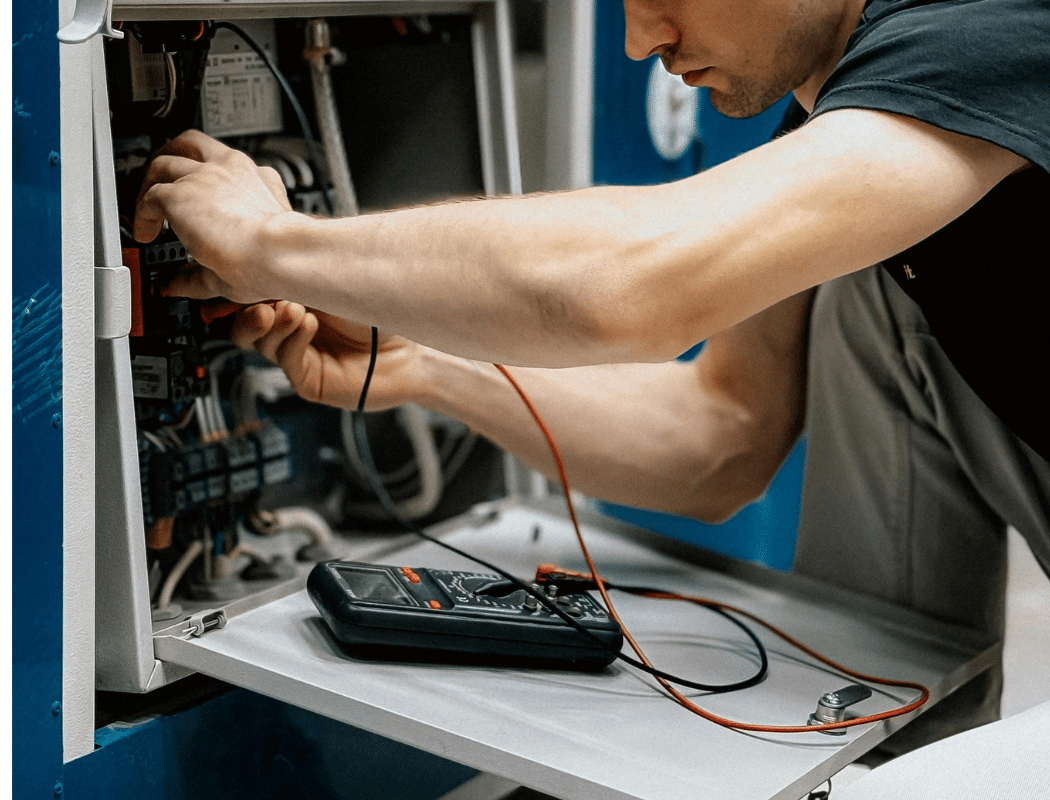
Reading the signs before the scan
An engineer working through meter and pressure checks on site, the diagnostic stage that shapes where the thermal and acoustic equipment gets pointed next.
Step 3: the thermal imaging scan
What happens
A thermal camera reads surface temperature differences across walls, floors and ceilings. Escaping water changes the temperature of the material around it, cooler in most cases, sometimes warmer if it is a heating pipe, and that shows up clearly on screen. The engineer sweeps the suspect zone identified in steps one and two, looking for a pattern that fits a pipe run rather than normal damp or cold-bridging.
This is the core of our thermal imaging leak detection service, and it is why the whole visit can stay non-invasive. The camera reads through plaster, tile and floor covering without any of it being removed.
Step 4: acoustic listening
What happens
Pressurised water escaping from a pipe makes a sound, even underground or behind a wall. Acoustic equipment picks that sound up and lets the engineer compare volume and pitch at different points along the suspected run. The loudest, clearest point is usually closest to the leak. Combined with the thermal image, this narrows a wall or floor area down to a much smaller patch, often no bigger than a dinner plate.
Acoustic listening works best alongside thermal imaging rather than instead of it. Thick stone or granite walls, common in older Scottish tenements and cottages, can muffle sound more than a modern timber-frame wall, so cross-checking with a second method matters more here than in a new-build. It is one of the reasons we quote a 99% success rate across more than 5,000 leaks: no single tool does the job on its own.
Step 5: tracer gas, if needed
What happens
If thermal and acoustic readings still leave doubt, usually on a longer pipe run or a particularly dry leak, the engineer introduces tracer gas. It is a safe mix of 5% hydrogen and 95% nitrogen, pushed into the empty pipe under light pressure. Because hydrogen is the smallest molecule there is, it finds its way out through even a pinhole crack and rises to the surface, where a sensitive probe detects it precisely.
Not every job needs this step. Most leaks show up clearly with thermal imaging and acoustic listening alone. Tracer gas is the tie-breaker for the harder cases, not a default.
If you smell gas at any point during a survey or at any other time, that is a gas emergency, not a water leak. Leave the property, avoid switches and naked flames, and call the National Gas Emergency line on 0800 111 999. Leak detection engineers do not handle gas emergencies.
Step 6: marking the spot and the written report
What happens
Once the location is confirmed, the engineer marks it directly on the surface, usually with tape or chalk, so there is no ambiguity about where any repair or opening-up work needs to happen. You get a written report the same day covering what was found, where, and the method used to confirm it. Because our reports are insurance-approved, you can hand the document straight to your insurer or factor without a second visit or a follow-up assessment.
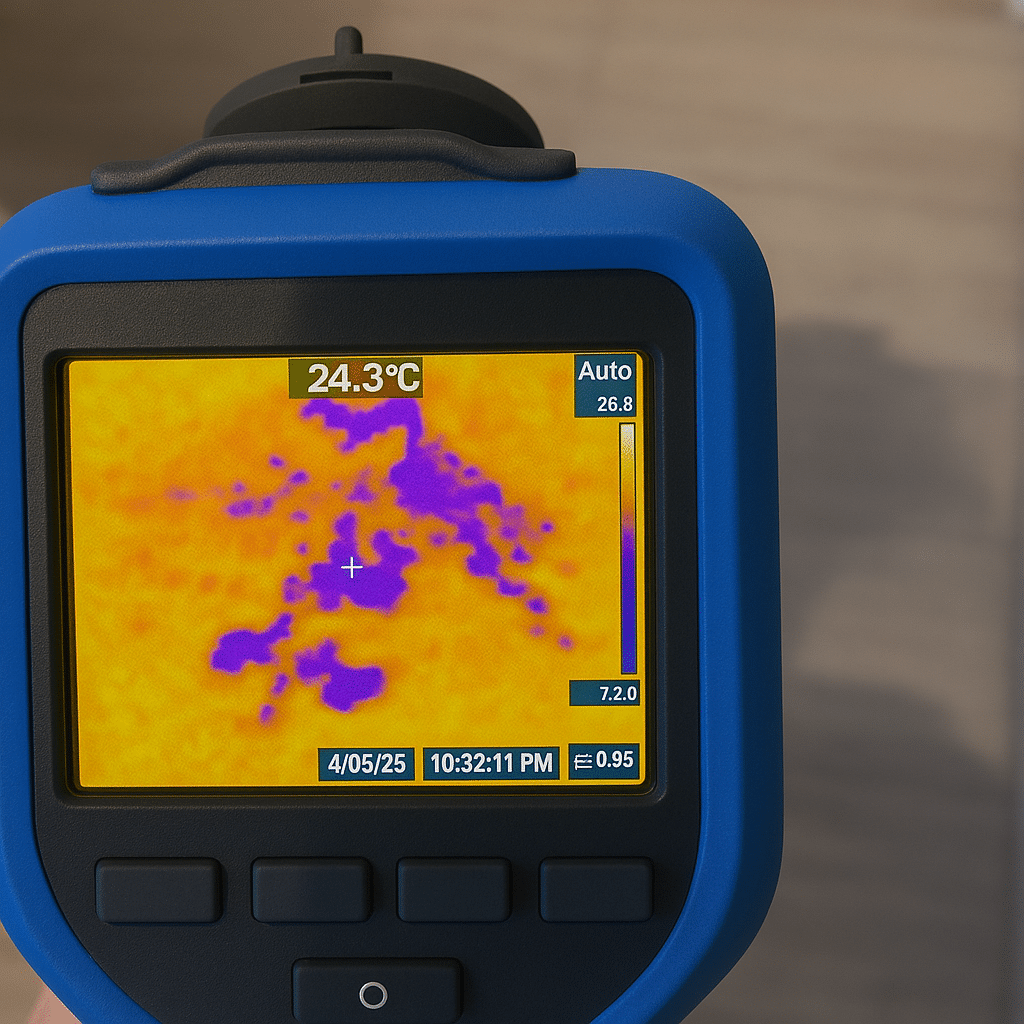
What the camera looks for during a leak detection survey
A thermal imaging camera used mid-survey, scanning for the surface temperature pattern that separates a genuine leak from ordinary damp or cold spots.
If you are dealing with a shared pipe in a tenement, the report also helps establish whether the source sits in your flat’s own pipework or in a common supply, which matters for who pays. Under One Roof, the tenement advice service, recommends checking title deeds to establish responsibility once the source is known, and escalating to a factor or the council’s Environmental Health team if another owner will not act.
What the written report includes
The report sets out where the leak is, which system it sits on, and how the location was confirmed, supported by the thermal images and readings taken on the day. It also records the areas checked and ruled out. That detail matters if your insurer later asks why a particular wall or floor needs to be opened.
Keep the report with your policy documents. If you claim for the damage, it answers most of the questions a loss adjuster will ask, and it gives whoever does the repair an exact target rather than a search area.
- Have this ready: rough date the problem started, any recent plumbing or bathroom work, and access to your stopcock.
- Expect this outcome: a marked location on the surface, not an open wall or floor.
- Take this away: a written report you can pass to an insurer, landlord or factor the same day.
- Ask this if unsure: whether the leak sits on your side of the boundary or a shared section.
Book a survey that finds the leak, not an excuse to open your walls
Our water leak detection service follows this exact sequence on every job, and same-day survey slots are available across Scotland.
Why the whole process stays non-invasive
Trace and access cover on a buildings insurance policy pays for finding a leak and opening up the area around it, commonly up to around £5,000 according to Confused.com, but it does not pay for repairing the pipe itself. That distinction is exactly why a proper survey matters. Every stage above is designed to confirm a location with tools that read through surfaces rather than break them. Digging or lifting only happens once, in the spot the survey marks, which keeps that trace-and-access budget for the actual opening-up rather than a series of speculative holes.
The approach earns its keep in older buildings especially. In a Victorian tenement, lifting the wrong boards can disturb the lath and plaster ceiling of the flat below. In a modern flat with pipes buried in bonded screed, a speculative dig is expensive to make good. Either way, confirming the location first keeps the disruption to one small, deliberate opening.
What you get from this approach
- One confirmed location, not several guesses
- Floors and walls stay closed until the repair stage
- A written report ready for insurers or factors
- Faster route to the actual repair
Where it has limits
- Very old or mixed pipe materials can need tracer gas
- Thick stone walls can slow acoustic readings
- The survey finds the leak; repair is a separate job
Home-buyers sometimes ask for a survey before completion rather than after a problem shows up. If that is your situation, our piece on a pre-purchase leak survey in Scotland explains how the same process applies before you commit to a property. And if cost is the thing holding you back from booking, how much leak detection costs in Scotland sets out realistic ranges so you know what to expect before you call.
Frequently Asked Questions
Most residential surveys are finished the same day, often within a few hours, depending on how quickly the history-taking and diagnostic checks narrow down the area. A straightforward single-leak job is usually quicker than a tenement flat with a shared supply, where several possible sources need ruling out first.
Not during the survey itself. Thermal imaging, acoustic listening and tracer gas all work through existing surfaces. Nothing gets opened until the location is confirmed and marked, and even then, opening up is a separate repair step, not part of the detection process.
Yes, someone needs to be present, at least at the start and end. The engineer needs access throughout the property and will want to ask about the history of the problem before starting, so having the person most familiar with the issue on hand speeds things up.
This is rare. Meter and pressure checks confirm early on whether water is actually being lost, which rules out false alarms before the more detailed scanning stages begin. Where a result stays unclear, tracer gas is the tie-breaker most jobs do not even need.
Yes. The mix used is 5% hydrogen and 95% nitrogen, introduced only into the empty pipe being tested, not into the living space. A sensitive probe detects any gas that escapes at the surface once it has found its way out.
Yes. Our reports are insurance-approved, setting out what was found, where, and how it was confirmed. You can pass this directly to your insurer alongside your escape-of-water claim, which usually saves you from arranging a separate assessment or a second inspection visit.
You get the written report and the marked location on the day of the survey. From there, repair work, whether that is a plumber, a builder for opening-up, or a claim through your insurer, is a separate step based on what the report recommends.
📍 Professional Leak Detection Across Scotland
Know exactly what to expect before we arrive
Every survey follows the same non-invasive process and ends with an insurance-approved report. Same-day appointments are available across Scotland.